
Musings from Students of the Pardes Institute of Jewish Studies in Jerusalem
Posted on December 25, 2011 by Sean L.
I was curious about why there are so few hard cheeses in this region, and after investigation, I started looking into making soft cheeses and realized just how easy it is to make yogurt (which can be Lebnah, or even a nice replacement for cream cheese). I’ve told a few people that I make yogurt, and they ask, “why when it is so inexpensive here?” … well, when you make it yourself you can add a few twists, plus its really fun to actually make things like this from scratch (and it is slightly cheeper to make it yourself). Here’s how I make it:
You will need a crock pot for this recipe, a thermometer (you can get a milk thermometer in the shuk > the big housewares store on Mahane Yehuda has them), and a towel. You also need (for at least the first batch) one of those jugs of yogurt you can get in the super, you don’t want any of the smaller cups – unless you can be sure that there are live cultures in it. A lot of the yogurts here have thickeners that you don’t want in your yogurt, so I’d just go with the jug. Once you have these things, you’re good to go. I got my recipe from http://www.macheesmo.com/2011/04/crockpot-yogurt/ and as all Talmudists know, its a mitzvah to quote the source, however, I’m basically going to steal the source and add a few footnotes of my own throughout the process (this guys got pictures –i’ve replaced some with pictures relevant to here– and everything, so I thought it would help.)
Prep Time: 10 minutes;
Total Time: 8 hours
Ingredients:
Helpful Equipment:
The Ingredients
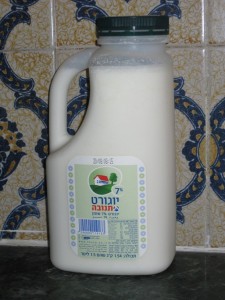
There’s really only two ingredients to yogurt: Milk and bacteria. The best way to get the bacteria is just to “borrow” it from a yogurt that you like. The best yogurt in Israel to use is the yogurt that comes in a jug.
Only two ingredients!
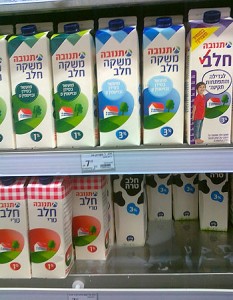
That said, there are some important notes to make when picking out a milk and a yogurt.
Important stuff.
As far as the yogurt goes, you can literally use any yogurt you want as long as it contains live active cultures in it. Most, but not all, brands do. Just be sure to check on the ingredients. You’re looking for the words “LIVE” and “ACTIVE”.
This should go without saying, but plain yogurt will make plain yogurt. Vanilla yogurt will make plain yogurt. Vanilla doesn’t reproduce, People. So just use the plain flavor to keep it simple. However, the last batch that I made I brewed some herbal tea into the milk as it was heating, and that was very tasty and worked great! So, you can play with flavors a little during the process as well.
It’s alive!
The Method
The reason why the crockpot is such a perfect tool for yogurt making is because it’s really important to keep the yogurt at a pretty narrow temperature range while it’s doing its thing. I’ve tried a few different ways, but this one definitely produced the best results.
They do make yogurt makers which are very good at temperature control, but unless you’re making it frequently, I’m not sure it’s worth it to invest.
So, to start, make sure your crockpot is really clean and then add all your milk. Set it to low, cover it, and let the milk come up to around 180 degrees F. Anything in the 175-185 range works, but try not to go out of the range. Definitely don’t boil the milk or it will mess up the structure of it.
Bringing up the temp slowly works great. It might take an hour or so, but don’t try to rush it or you’ll run the risk of scalding the milk.
If you boil it, start over.
More waiting
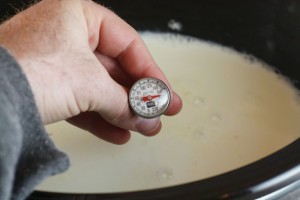
Once the milk reaches that temperature, you need to cool it down to about 120 degrees. Again, I think anything in the 115-125 range should work, but if it’s too hot, it’ll kill the bacteria and if it’s too cold they won’t get busy.
This is why a thermometer is almost essential for this process.
When your milk is the right temperature, take about about a cup of the warm milk and add 1/2 Cup of yogurt to it.
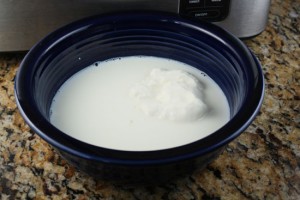
This is how you do it.
Stir this up really well and then add it back into the crockpot. Stir it all together.
Maintaining the Temperature
This is the tricky part for yogurt. You need to keep this batch of milk in that 110-125 temperature range for around 6 hours, but 8 would be ideal. This is no easy task.
My crockpot is really well insulated which definitely helped, but what I did was layer on a large beach towel, folded over a few times to the top of the crockpot. I figured that’s where most of the heat was escaping.
Once I added my yogurt, I turned off the crockpot and just covered it like this.

Temperature is really important.
This is shockingly effective.
If your crockpot is like mine (I have the ‘Gold Line’ model which is ubiquitous throughout Israel) it will retain heat very well, especially when its swaddled in a towel. My friend here just put a towel on time, I prefer to take my crock pot and envelop it in my towel. I often use a second one to put it on top like this guy does, but I think that when you really swaddle the thing, the heat is retained very well. The first time you try this, keep a close eye on it just to get a feel for how well your crockpot retains heat. If it’s doing a good job, then you can probably leave it unattended for the entire time assuming you do your best to keep the heat in, if it looks like the temperature is at the low end (like near 110 or below) just crank the crock pot on again for 10 minutes or so and then turn it off, this will help bring the temperature back into the right range.
The Finished Product
After 7 hours or so, I uncovered my yogurt to find this beautiful stuff.
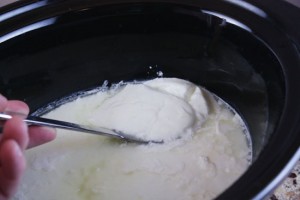
Sweet!
Now, the fresh yogurt will have some liquid on top. That’s okay. You can try to scoop out any large liquid pools and then stir the yogurt to combine everything well. This is what I did for the yogurt in the first photo in this post.
My yogurt was really tangy which I liked and had great flavor. I had it warm on night one with some honey and almonds. It was an awesome dessert.
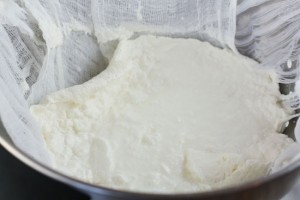
I prefer The Greek Method
I like my yogurt a bit thicker for everyday use. This is really easy to do once your yogurt is made. Just line a colander with some cheesecloth and pour your yogurt in!
Let this sit for about an hour or so and all that liquid will drain out. You’ll be left with a beautiful thick yogurt.
You can cheat a little bit here too by pressing the whey out of it using some kind of weight. I usually take a bowl, put it on top of the yogurt in the cheese cloth and then put things on top of the bowl. The bowl is perfectly shaped for applying pressure. Be careful though, depending on the cheesecloth setup, you might get some yogurt spurts.
Not only did my yogurt turn out to be better flavored than the original that I used, but I’m pretty sure it was cheaper also. I didn’t compute the financials exactly, but if you can get good milk for a reasonable price, than you can probably save a buck or two.
Once you get the hang of it, you can add all kinds of flavoring to it as well! If you have an immersion blender, it helps get some of the lumps out of the yogurt after you’ve strained it. If you want to make :Lebnah, just strain it for an hour or so until you have the thickness you want. Put it on a plate and throw some olive oil and zatar on it, and you have a beautiful dish for shabbat (thats MUCH cheaper than buying it in the store!)
Happy Yogurting!!!
More recipes to come!